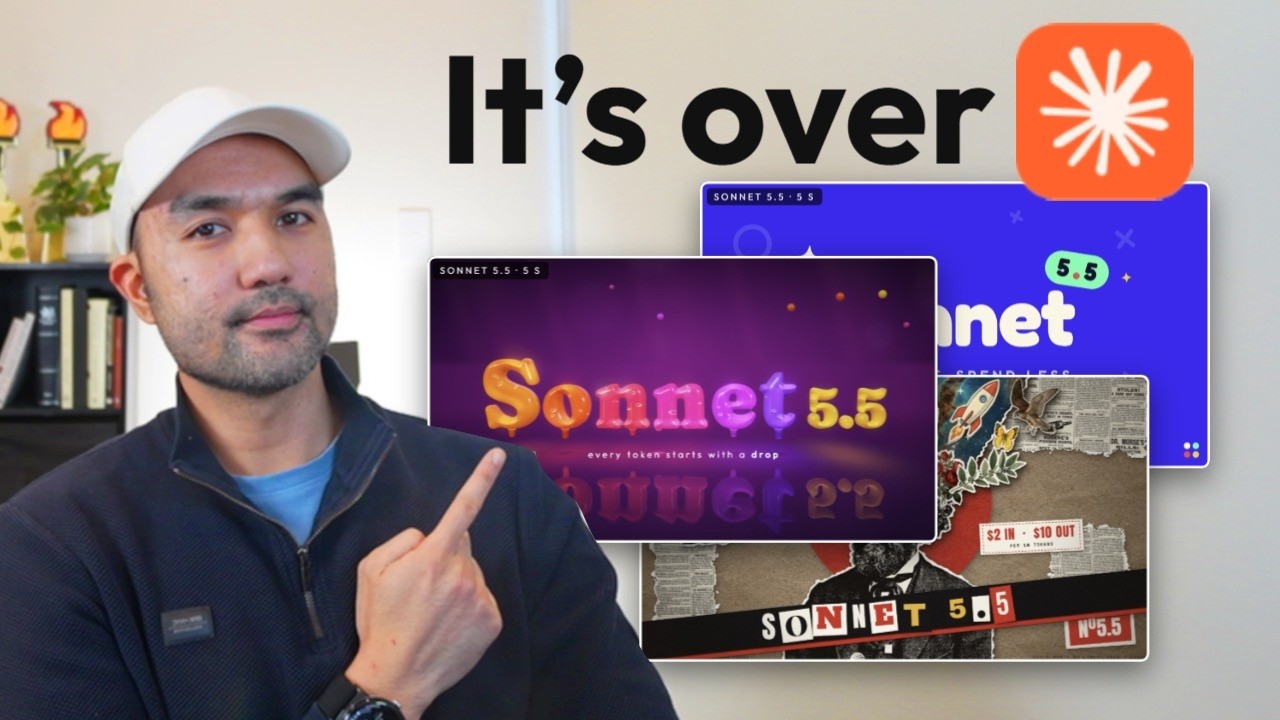
Sonnet 5.5 produces the same kind of motion-graphic video edits as Opus 5.5 at half the token cost, because the animations are HTML and JavaScript code, not generated video: every graphic is a layer you can isolate, recolor or re-animate.
The method is three steps wrapped in a skill. Step 1, cut: a starter prompt has Claude transcribe the raw footage with AssemblyAI (Whisper free but slow, ElevenLabs as a paid alternative), keep the last clean take of every line, and cut with FFmpeg. Step 2, animate: declare a real design system instead of Claude's defaults. Step 3, direct: leave timestamped comments, send them in one go, iterate, then fold the session's feedback into the /animate skill.
Design systems come from three places: styles.refero.design (2,000+ DESIGN.md files), gallery sites such as skillry.dev (475 Opus 5.5 videos with their prompts) and watchships.com (startup launch videos), or from any video on the internet by having Claude take FFmpeg contact sheets of it and derive the style.
One prompt gets you about 80% there; the reviewing pass is where production quality comes from. Jay's community tool, the Rubric editor, turns Premiere-style trims and pinned notes into a feedback export that Claude reads back.
A generic prompt with no design system yields Sonnet's defaults, the look Jay calls the coming wave of AI slop; the differentiator is a codified house style.
Intro: the claim and the demo
Sonnet 5.5 shipped early this week, and Jay opens by saying it turns out to be "quite incredible" for video editing and motion-graphic animations like the ones scrolling across his page 0:00. It is also half the token cost of Opus 5.5, which matters because Anthropic's larger model had already drawn praise for exactly this kind of work; the whole bet of the video is that the cheaper model can match it. The opening demo makes the claim concrete: at the left of the screen is raw footage of Jay from one of his own videos, and with a single prompt that called on a workspace skill named /animate, Sonnet 5.5 produced the edited result on the right 0:16. The side-by-side panel labels the two frames "Raw footage" and "Edited with /animate", with the right-hand card reading "Editable and animatable: every graphic you get back from Claude" above icons, illustrations and diagrams.
The opening demo at 0:16: one prompt, one skill, raw footage in, animated edit out.At 1:18 the edit shows the SVG code next to the icon it animates.
The clip being edited is itself a tip from one of Jay's talks, "Number 17 is to ask for SVGs": whenever you want Claude to produce new icons, illustrations or diagrams, ask for them in SVG, scalable vector graphics, so they scale to any size without going blurry, can be opened and recolored by hand, and can even be animated by Claude. On screen at 1:18, "Have Claude animate these icons" appears beside SVG code using an animateTransform rotate instruction. Because SVG is code, every graphic Claude returns is editable and animatable.
All of the cuts, all of the animations and all of the motion graphics in the video were done by Sonnet 5.5, Jay says, working from his own design system, the one used in his videos 0:50. The same approach reaches far beyond that house style: he lists flat vector animation, isometric style graphics, 3D render animations, liquid motion, glassmorphism animations and cutout animations in the manner of Vox. On screen at 1:24 a style gallery grids these out as Frame by Frame, Isometric 2.5D, Flat Vector, 3D Render and Shape Morph, and at 1:12 a Vox-style cut-out collage spells out "SONNET 5.5". Pretty much any style you want, Jay concludes, and the promise of the video is a three-step recipe for building a skill like /animate so you can use Sonnet 5.5 for video animations without relying on any other AI video generation model.
Cutout style at 1:12, one of the looks Sonnet 5.5 produced from code.The style gallery at 1:24: Frame by Frame, Isometric 2.5D, Flat Vector.Scrolling on at 1:30: 3D Render and Shape Morph.
A quick introduction before the method: Jay spent over a decade working with brands, has been in AI since his master's in data science, and now leads an AI business and one of the largest AI communities globally 1:31.
Context: code-based animation and design systems as skills
Sonnet 5.5 was released a few days before the recording and is, in Jay's words, the cheaper version of Anthropic's Opus 5.51:39. Opus 5.5 is, by a lot of independent accounts including Jay's own internal testing and his community, really good at this, and his previous video was about how good it is at video editing. The question he set out to answer: given Sonnet 5.5 is half the cost, can it produce videos almost as good as Opus, or better? His answer is that it absolutely can, and the videos on screen (flat animations, 3D renderings, a collage or cutout animation, a glassmorphism style) were all created with Sonnet 5.5 without any extra AI video generation model 2:10.
What is important to remember about all of these videos is that they are done with code. You can literally go into one of them and isolate each element: at 2:34 a Shape Morph project is open in an in-browser editor, and by 2:47 Jay has turned the other layers off so that a single "Coin" layer sits alone on a transparent checkerboard, with Pen nib, Paper plane and Ball layers selected in turn. What Sonnet is doing, he explains, is creating all of these animations through JavaScript and HTML, handling the motion graphics under the hood; the particular shape morphing between styles is all Sonnet 5.5's code.
The composed Shape Morph animation at 2:34.One layer isolated at 2:47: the proof that the animation is code with editable layers, not rendered pixels.
That is the structural difference from AI video generation models, which Jay calls black boxes that are hard or costly to replicate. If you have a style that is dialed in, like the flat vector style, you can reuse it by asking Sonnet to turn it into a design system, make that design system part of a skill, and use that skill whenever you want to animate videos like these 3:01. His demonstration runs the same "Number 17 is to ask for SVGs" clip through three design systems other than his own. Between 3:27 and 4:10 the clip plays under four headers: "Edited with /animate" (Jay's own system, with the card "Icons, illustrations, diagrams when you ask Claude for new ones"), "Center stage: Isopolis (isometric)", "Center stage: Popwise (flat vector)" and "Center stage: Soft (3D render)". Because Sonnet understands the transcript of what Jay said, it fit each design system to the message: the isometric design system builds the SVG tip as a little city block, the flat vector one adjusts the visuals while keeping the core of the message, and the third uses more 3D elements. Jay says he probably will not switch his own style to the 3D look, but the point stands: if you have a core theme you want and you codify it into a skill, you can do pretty cool things with a capability that Sonnet 5.5 now gives you at a much cheaper price than Opus.
Jay's own system at 3:27.Isopolis, isometric, at 3:34.Popwise, flat vector, at 3:55.Soft, 3D render, at 4:10.
All of those design themes are the work of Vincent Wei, who Jay calls a good follow on X because he does a lot of these animations. Vincent created his animations with Opus 5.5, and Jay was curious whether Sonnet could do the same 4:15. He also sets up a later payoff: he will show how he codified these design systems just by feeding Claude the video, which means you can take any video from the internet, feed it to Claude, and create your own design system from it 4:32.
Step 1: transcribe and cut
The first step applies especially when you are editing a video with spoken words, like the talking-head footage shown earlier: you need a way to transcribe what is said so that Sonnet can cut it, excluding pauses and false takes from the final edit 4:44. Jay's slide frames it as "Step 1: cut. Transcribe, then keep your best takes".
Getting started is a starter prompt that gives the path to the raw footage and asks Claude to transcribe it with AssemblyAI. The prompt on screen at 5:08, titled "Cut the raw footage down to your best takes", reads in full:
transcribe my raw recording and cut it into a clean video that keeps only my best take of each line. - my raw footage is here: C:/path/to/raw-footage.mp4 - transcribe it with AssemblyAI, a speech-to-text service that gives the exact time of every word. if i don't have a key, use Whisper instead (free, runs on my own computer, slower) - never ask me to paste my AssemblyAI key into this chat. make a .env file in this folder with an empty ASSEMBLYAI_API_KEY= line and tell me where it is. i'll fill it in myself, then you read it from there - when i say a line more than once, keep the last clean take and drop the earlier tries. also cut stumbles, restarts, coughs and long pauses - before you cut anything, show me the full text you plan to keep so i can read it through and ok it - then cut it in one go with ffmpeg (a free video tool, install it if it's missing) and save it next to the raw file as cut.mp4, with a transcript of the cut - check every join for chopped words or clicks, and list anything you're unsure about with its time only remove things. never reorder or rewrite what i said.
The Step 1 starter prompt at 5:08. Note the .env handling: the key never goes into the chat.
Jay is not sponsored by AssemblyAI but uses it a lot for his own videos. Once you send a prompt like this, Claude will guide you through signing up; AssemblyAI was still offering free credits for new signups, which last a long time for transcribing long footage, and Claude will point you to where the API key lives, in the AssemblyAI settings 5:20. The site itself is shown at 5:19 ("Voice AI infrastructure for builders"); the settings page is not shown on screen. All of the starter prompts and resources in the video are collected in an eight-page PDF guide Jay links below the video, titled "Automate your video editing with Sonnet 5.5: copy-paste prompts for every step"; you can send that PDF guide to Claude and let it grab the prompts from it 5:44.
AssemblyAI at 5:19; the API key is under its settings.The eight-page PDF guide at 5:44.Its "The 3 steps" page at 5:54.
AssemblyAI is not the only option. If you want a free tool, Whisper is another good one, but it uses your own CPU: an hour of audio takes around 15 to 50 minutes depending on the machine 6:02. With AssemblyAI an hour of audio takes about 42 seconds, one of the fastest Jay has tried. If you already have an ElevenLabs subscription you can use that at a reasonable per-hour cost; it is a bit slower than AssemblyAI. The comparison slide at 6:10 puts numbers on all three: Whisper, free, open-source model that runs on your own PC (Groq also hosts it free for up to 8 hours of audio a day and runs the same model in 17 s), 15 to 50 min per hour of audio; AssemblyAI Universal-3.5 Pro at $0.21 per hour (the budget Universal-2 at $0.15, $50 free credit on signup), 42 s per hour and about 9 s for a 5-minute file; ElevenLabs Scribe v2 at $0.22 per hour (free plan 4 h 30 min a month, realtime version $0.39), 1 min 11 s per hour.
To show the output, Jay plays footage of about a minute and 50 seconds that was transcribed with AssemblyAI; the transcript is a script of what he said, and Claude then looked at it and identified which parts were worth keeping 6:40. Played at 2x, the raw take has a false take near the start ("Number one, design system"), and because Claude understands the transcript it could identify the best take, or, as Jay had instructed it, the latest take 7:05. The Rubric editor frame at 6:44 shows the transcript pane with the kept clips listed (1. design systems; 2. Give Claude 5,000+ design styles; 3. Let Claude shortlist the top three; 4. Build design systems in Claude Code; 5. Fonts, Furniture and Format; 6. PDF guide) above a cut timeline.
The Rubric editor at 6:44: transcript, kept clips, cuts.
When you send this prompt, Claude will most likely hand back the final edit as an MP4 on your machine, and you can give feedback in that same chat session. Jay finds video editing much easier with an interface, which is why he shows the Rubric editor, a tool his community is developing and has started using themselves 7:20. If Claude made errors in its cuts, you adjust the clip the same way you would in Premiere; each adjustment adds a note, and a couple of notes Claude already fixed are visible at 7:43. You then copy the comments for all of those clips and send them to Claude, and what Jay usually does is have it calibrate the skill so that the next time it cuts a video it is more refined about how much to cut and more personalized to how he speaks. The export pasted into Claude Code at 7:50, with Sonnet 5.5 selected, shows the shape of that feedback: a header "RUBRIC Editor feedback - C-0768 Claude Design tips, per-section cuts", a batch path under C:/ROBO/animate/output/, and a legend. APPROVED means Jay signed the clip off at that version; NOT APPROVED means still in review. Source trims are EXTEND (bring back footage the autocut removed), TRIM (remove more) and DELETE (drop a whole kept clip), applied by swapping in new keptSourceRanges and re-cutting the section. ADD marks something to add at that spot of the reel ("ADD raw Xs to Ys" names the seconds of the raw recording), PIN is a comment about one spot of the picture at that moment, and scene numbers start at 1 (STORYBOARD.json index plus 1). The approval list then opens with "00 Hook: NOT APPROVED". You do not need to build an interface like this, Jay adds, but it helps if you make a lot of videos.
Notes from trims at 7:43.The feedback export in Claude Code at 7:50: status legend, trim verbs, ADD and PIN.
Jay closes the step with a word on his community: the RoboNuggets program covers how to build and sell AI systems that businesses pay for, with the Claude Living Masterclass updated weekly and an agents as a service course on getting paid for these skills 7:55.
Step 2: a real design system, not the default look
Once the video is cut, the next step is for Sonnet to animate it, and Jay's warning is that a generic prompt will probably disappoint you 8:44. Using the same raw footage, he asked Claude for a version with its defaults, no extra skills and no particular design system, and the result plays under the header "Plain Claude Code, no skill" at 9:05. It is not bad as such, but because these are Sonnet's defaults they are quickly going to become the new AI slop that people want to avoid: AI slop, as he puts it, is beginner users prompting Claude with no design system and getting the same defaults everyone else gets. The way to differentiate yourself is to create your own design system and, when you ask Claude to animate, declare it so Claude understands the specific aesthetic you want.
The Step 2 slide at 8:48.The default look at 9:05, what one prompt with no skill produces.
If you do not have a design system, the first resource to bookmark is styles.refero.design, whose headline reads "Start with a design you love" over 2,000+ AI-readable design systems from leading product websites, each opening into colors, typography, spacing, components and a DESIGN.md you can use in Cursor, Claude Code, Codex, v0 or Lovable 9:40. For a style such as Slush, the page carries that design markdown file; copy it, send it to Claude, and ask it to create a design system and a skill, say /slush-design, so that typing the skill in a prompt reproduces that design 9:47.
styles.refero.design at 9:40.Slush and its DESIGN.md at 9:47, the file that becomes a /slush-design skill.
Refero is mainly website design systems. For motion graphics, Jay has recently found sites that collect videos made with Claude, in this case with Opus 5.5. The one on screen is skillry.dev, whose "Opus 5.5 videos" page ("Viral videos people made with Claude Opus 5.5. Each one comes with the original prompt and a live remake") lists 475 videos filtered into Motion graphics (288), Explainers (62), 3D scenes (55) and Games (70) 10:00. Not all of them are great, but some are unique enough to fit a use case, and clicking one gives attribution to the original post plus a starter prompt you can copy 10:29. Another is watchships.com, "Discover startup launch videos from X", which has a lot of launch videos for applications; each card links through to the X post (for example "Ramp x Stripe: agent purchasing"), but the site does not carry the prompt to replicate the design system 10:35.
skillry.dev at 10:00.Each card carries attribution and a starter prompt, 10:29.watchships.com at 10:37.A launch-video detail page at 10:49: the X link, but no prompt.
So what do you do when a style you want comes with no prompt? Have Sonnet 5.5 watch the video for you and replicate the design system from what it sees 10:55. Jay's example is the Vincent Wei post he saw on X. Translated from Chinese, it reads: "I've recently tried a ton of different styles for making videos with opus5.5, and some of the effects are just stunning. This video recaps 15 styles from my experiments that reach professional production quality. The entire video, music, and sound effects were all created by opus5.5 through code generation. I'll share the prompts for each style later." In a reply Vincent says he "will upload each prompt to GitHub later" 11:09. Since the prompts were not out yet, Jay gave Claude the link to the X post and had it use FFmpeg to take screenshots of the video and analyze those frames to replicate the styles with Sonnet 5.5.
Vincent Wei's post at 10:55: 15 styles, all Opus 5.5 code generation.The prompts were promised for later, 11:09, which is why Jay had Claude watch the video instead.
In Claude Code, in a session named "FFmpeg screenshots for X post", Jay asks "show me the screenshots you took with ffmpeg for this x post" with the post's URL, and Claude replies that it checked whether a past session saved them and returns "Contact sheets from the Vincent video: 6 sheets, 30 frames each, covering the full 3-minute clip" 11:28. The contact sheet it shows at 11:37 is how Claude "watched" the video: a grid of screenshots from which it picked out the themes and design systems Jay wanted and tried to recreate them with Sonnet 5.5. For anyone who has not used FFmpeg, Jay notes it is an open-source tool that has been around for 20-plus years and automates basic video commands such as taking screenshots, which makes it a good fit for agents. From those screenshots he asked Sonnet to create design systems, and that is how the styles in his design-system library came about: the grid at 12:04 lists Frame by Frame, Isometric 2.5D, Flat Vector, 3D Render and Shape Morph, ready to reuse.
The FFmpeg screenshot request at 11:28.The contact sheet at 11:37, the input Claude derived the design systems from.The resulting library at 12:04.
The takeaway for this stepprompt Claude generically and you will probably be disappointed; what you need first is a real design system attuned to your use case 12:08.
Step 3: direct, then codify the /animate skill
Even with a design system and properly cut footage, one prompt to animate the footage will very likely not give you the final result you want. You will probably get 80% there; polishing it is step three, which is about directing: looking at the beats and every animation Claude made and giving feedback on the changes you want 12:28. The slide reads "Step 3: direct. Pin notes on the video in the RUBRIC Editor".
Jay's example is a clip in which he talks about Claude Design, so he had Claude add the actual Claude Design UI into the animation, "very meta". What plays at 12:48 is version two. It was not a one-shot result: version one, at 13:02, opened with line art animations ("It's web-based: it can't get to the files on your computer" drawn as a browser sketch), which Jay thought were okay but improvable by showing the real Claude Design UI. When you get results like that, suboptimal and about 80% of the look you want, you can give feedback through the chat, which still works, but it is much easier with an interface where you can put comments on the video itself.
Version two at 12:48: the real Claude Design UI.Version one at 13:02: line art, the look Jay asked to replace.
In the Rubric editor you click any part of the video and leave a comment; the comment carries your words and the timestamp of the exact spot where you made it 13:40. The note on screen at 13:44 reads "actually show the claude design UI". Once the review pass is done, Jay copies all of the comments, goes back to Claude, and sends the whole thing in one go. Version two accommodated the request: it now uses the Claude Design UI, which in his view is a much better experience for viewers than the line art infographic animations Claude started with, because people recognize the interfaces they already use 14:15.
A pinned, timestamped comment at 13:44.The same beat after feedback at 14:15.
That is the secret, Jay says: steps one and two you can pretty much automate, and a one-shot run often gets a result that is 80 to 90% there, with Sonnet 5.5 already capable of really good animations on its own. For production-level quality, step three matters most, because it is where you give feedback and iterate 14:30. The slide at that point shows all three steps in one strip: Step 1 cut (transcribe, then keep your best takes), Step 2 animate (a real design system, not the default look), Step 3 direct.
All three steps on one strip at 14:30.The closing instruction at 14:52: fold the session into the skill.
The last move is where the method becomes reusable. In that particular session, the one where you have communicated the design systems and every piece of feedback, you ask Claude to make your /animate skill, so that all the learnings from that session and all the feedback you sent are codified into that /animate shortcut 14:40. If you already have one, all that remains is to have Claude update it based on skill creation best practices; each time you ask your agent to do that, the skill gets polished further to suit your taste 15:11. That, Jay closes, is how he makes those videos and how you can rely on Sonnet 5.5 for quality animations even as a one-person team.
Tools and resources
Tool or resource
Role in the method
Where it appears
Claude Sonnet 5.5 (Anthropic)
Does the cutting and all the code-based animation; half the token cost of Opus 5.5
throughout
Claude Opus 5.5
The reference model; Vincent Wei's 15 styles and the skillry.dev gallery were made with it
Sonnet 5.5 is "half the token cost" of Opus 5.5 (pricing is date-sensitive; check Anthropic's current pricing page).
AssemblyAI Universal-3.5 Pro transcribes an hour of audio in about 42 seconds and costs $0.21 per hour, with a $50 signup credit (slide figures, 6:10).
Whisper on a CPU takes 15 to 50 minutes per hour of audio; Groq hosts it free up to 8 hours of audio a day and runs it in 17 s (slide figures).
ElevenLabs Scribe v2 costs $0.22 per hour with a free plan of 4 h 30 min a month (slide figures).
styles.refero.design hosts 2,000+ design systems with downloadable DESIGN.md files usable in Claude Code (site headline, 9:40).
skillry.dev lists 475 Opus 5.5 videos with their original prompts (site counter, 10:00).
Vincent Wei has since published the prompts for his 15 styles on GitHub (promised in a reply, 11:09).
Glossary
Sonnet 5.5: Anthropic's mid-size Claude model released the week of the video; the one doing the editing here.
Opus 5.5: Anthropic's larger Claude model, the reference Jay compares Sonnet 5.5 against; about twice the token cost.
Token cost: What a model charges per unit of text processed; "half the token cost" means the same job costs half as much.
Motion graphics: Animated text, icons, charts and shapes layered over or instead of live footage.
SVG: Scalable vector graphics, an XML-based image format that stays sharp at any size and can be edited or animated as code.
Design system: A written set of colors, typography, spacing, components and motion rules that defines a visual style.
DESIGN.md: A markdown file describing a design system in a form an AI coding tool can read, as served by styles.refero.design.
Skill (Claude Code): A reusable instruction file invoked with a slash command (such as /animate) that packages a workflow and its learnings.
/animate: Jay's own skill that carries his design system and the cutting and animation rules he has refined.
Talking head: Footage of a person speaking to camera.
Raw footage: The unedited recording, with pauses and repeated takes still in it.
False take: A line the speaker started and abandoned or repeated; the cut keeps the last clean take.
Transcription: Turning the spoken audio into timestamped text so the agent knows what was said and when.
AssemblyAI: A paid speech-to-text API with word-level timestamps; the default transcriber in the starter prompt.
Whisper: OpenAI's open-source speech-to-text model; free but slow on a CPU.
ElevenLabs Scribe: ElevenLabs' transcription product, a paid alternative to AssemblyAI.
API key: The secret string that authenticates requests to a service; the prompt keeps it in a .env file, never in the chat.
.env file: A local text file holding environment variables such as API keys so programs can read them without the user pasting them.
FFmpeg: A 20-year-old open-source command-line tool for cutting, converting and screenshotting video.
Rough cut: The first assembled edit, before polish; here the output of Step 1.
Rubric editor: The RoboNuggets community's video-review interface where trims and pinned notes become feedback for Claude.
keptSourceRanges: In the Rubric editor export, the list of raw-footage time ranges that make up a cut section.
STORYBOARD.json: The scene list file the Rubric editor references; scene numbers are its index plus one.
Glassmorphism: A visual style using frosted, translucent panels with blur and soft light.
Isometric: A drawing style with a 2.5D angled grid and no perspective convergence.
Flat vector: Illustration with flat colors and shapes, no shading or texture.
Cutout animation: A collage style that moves paper-like cut pieces, as popularized by Vox explainers.
Liquid motion: Animation where shapes flow and morph like fluid.
AI slop: Low-effort generic output that looks like everyone else's AI defaults.
Vibe coding: Prompting an AI to build something without a considered design or spec.
Contact sheet: One image tiling many video frames in a grid, used to review or "watch" a video at a glance.
X post: A post on X (formerly Twitter).
Beat: A single moment or idea in an edit that the visuals should land on.
Version one, version two: Successive iterations of an animated clip before and after feedback.
One-shot prompt: A single prompt expected to produce the finished result without iteration.
Skill-creation best practices: The conventions for writing and updating a Claude Code skill file so it stays clear and reusable.
Personal recommendations
1
An /animate-style skill for Alexana explainer videos
Jay's /animate skill holds his design system plus every cutting and animation learning, and he updates it from each session's feedback using skill-creation best practices.
System value
Anthony already produces explainer and marketing video (the Matt pool-service explainer, Essence product video); a house design system in a skill would let Sonnet 5.5 animate talking-head or voiceover footage without Higgsfield spend for the motion-graphics parts.
Proposed form
Skill, built after a grilling pass on the Alexana visual system; one-word slug per the naming rule.
Target project
alexana-workspace (skill), with alexana-brand as the design-system source.
2
Transcript-driven rough-cut skill for talking-head recordings
The Step 1 starter prompt: transcribe with AssemblyAI (or local Whisper), keep the last clean take of each line, show the keep list for approval, cut in one go with FFmpeg to cut.mp4 with a transcript, never reorder.
System value
The box already has whisper-transcribe and FFmpeg; a cut skill would turn Anthony's raw Loom-style recordings into clean clips for client updates and course lessons.
Proposed form
Skill wrapping the prompt, defaulting to local Whisper (no new vendor), with the .env pattern for an AssemblyAI key if speed matters.
Target project
alexana-workspace.
3
Design-system intake from styles.refero.design and gallery prompts
Copy a DESIGN.md from styles.refero.design (or a skillry.dev starter prompt) and have Claude turn it into a named design-system skill such as /slush-design.
System value
TheGallery and DESIGN.md conventions already exist in Anthony's build flow; a documented intake step gives client site builds a faster, reference-backed starting style.
Proposed form
Reference note in build-and-design-docs plus a short recipe in the impeccable pipeline.
Target project
alexana-workspace.
4
"Watch a video with FFmpeg contact sheets" as a reusable recipe
Claude took six contact sheets of 30 frames each from a 3-minute X video and derived five reusable design systems from them.
System value
The /yt skill already uses contact sheets for review; the same move applied to competitor or reference videos would let marco-advisor and the design pipeline extract a visual style from any clip Anthony points at.
Proposed form
Reference recipe (ffmpeg tile command plus the derivation prompt), filed beside the yt-pipeline experiments.
Target project
learning (yt-pipeline-experiments repo).
5
Timestamped-comment review loop for agent-made media
The Rubric editor pins a comment with the clip timestamp and exports all notes in a legend-driven format (APPROVED, EXTEND, TRIM, DELETE, ADD, PIN) that Claude applies in one pass.
System value
Anthony reviews agent-produced video and pages on mobile; a lightweight HTML review page that batches timestamped notes into one paste would replace back-and-forth chat corrections.
Proposed form
Build (a small local-first review page), scoped after candidate 1 exists.
Target project
alexana-essence (it already owns the video-review surface).
Take this with you
Save the playbook to read later, or hand the raw notes to your favorite AI.
What's this?
The Markdown file (a .md file) is a plain-text copy of this whole playbook, written in the simple format AI chat tools read best. It keeps the headings, links, timestamps, and captions and drops all the page styling. Think of it as the raw notes behind this page, ready to hand to an assistant.
To use it, download the file and drag it into ChatGPT, Claude, or any AI chat (or just paste the text in), then ask for what you want: “Summarize this into a one-page cheat sheet,” “Turn these steps into a checklist I can follow,” or “Quiz me on the key ideas.” Because the file is already structured, the assistant works from the real content instead of guessing.